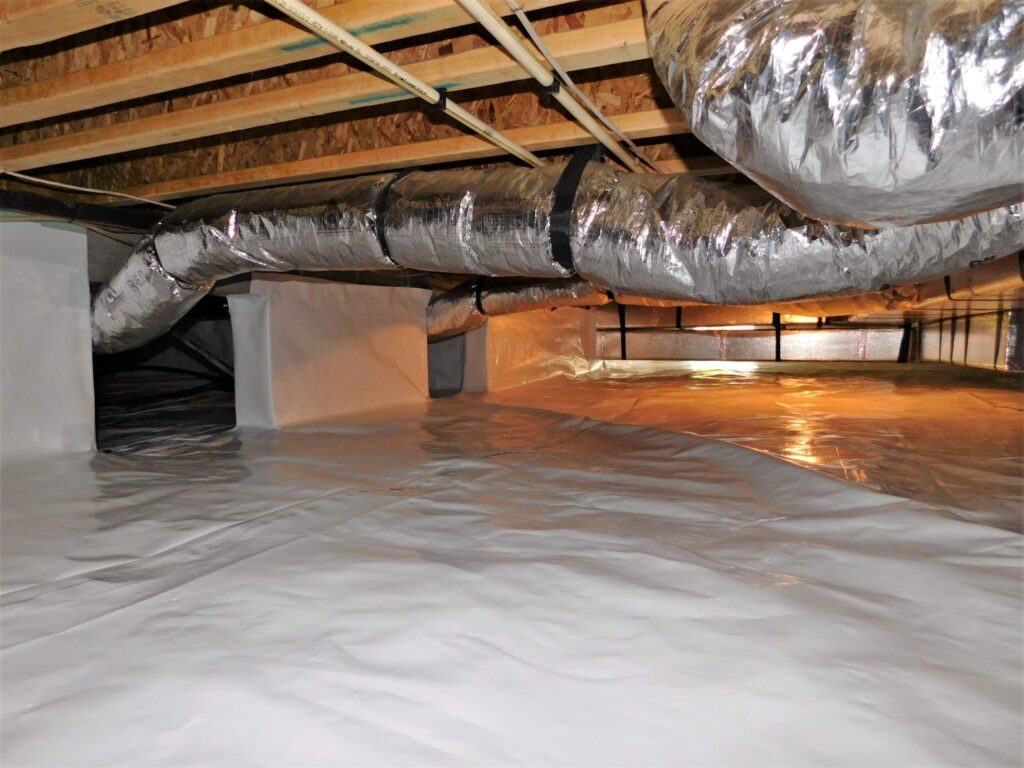
More than 27 million homes in the U.S. have crawl spaces. And even though they’re exceedingly useful for extra home storage, it’s absolutely essential to keep them protected and dry to avoid the possibility of water and mold damage by installing a crawl space vapor barrier.
According to the EPA (Environmental Protection Agency), 100% of all types of mold have the potential to cause some health effects. This can be minor to severe and even result in death in some rare cases.
Here’s our homeowner’s 3 step guide to follow when you are installing a crawl space vapor barrier for your home or business.
Do You Need Extra Crawl Space Insulation For Your Home?
Before investing in any type of crawl space dehumidifier or basement waterproofing system, you need to determine your home’s needs.
In order to ascertain whether or not your home’s basement or crawl space has a problem with accumulating excess moisture, look at the pipes and concrete walls that surround the space.
If they’re wet to the touch or even have gathered a small amount of moisture, it’s a sign that you’re experiencing a common problem that does require a solution such as a crawl space vapor barrier.
What To Expect
Crawl space vapor barriers are relatively cheap, and experts say they can be installed in just one day. The installation process is moderately complex, but with proper planning and strategic problem solving, you can complete the process as efficiently as possible.
Required Tools And Materials
To ensure a smooth installation process, you need to gather the proper tools and materials. Although crawl space vapor barrier products do have slightly different specifications based on the manufacturer, their installation processes are very similar.
Prepare beforehand by making sure you have the right tools:
-A Caulk Gun
-Utility Knife
-Ruler
-Hammer
-Tape Measure
These are the main tools required. As for other materials, you’ll need:
-Caulk
-The Insulation or Moisture Barrier
-Tape
-Treated 1x4s
-Landscape Fabric Stakes
Once you have these necessary items, you can then begin your installation process.
#1 – Lay Down Moisture Barrier
The first step in installing a vapor barrier is to lay it down on a flat, dry surface and measure it up.
When spreading and laying out your crawl space moisture removal barrier, make sure to overlap all seams and tape them for maximum protection.
Experts say the plastic should be secured at a distance of about six inches up the wall.
Next, use the landscape fabric stakes to keep it protected for potential future disturbances.
Chances are that someone will have to slide around in the crawlspace later to fix a pipe or run a new cable. A few holes won’t make any difference in performance, and they’ll drain puddles if a heavy rain or leaky pipe leaves water on the plastic.
#2 – Protect Exposed Foundation
The next step is to cover any areas of your home’s foundation that may be exposed with one to one and a half inches of moisture proof insulation.
This helps to maximize the overall effectiveness of the basement waterproofing system and keep your home and belongings as safe as possible.
These barriers also help to keep the increasing dampness in the concrete from making its way into your home’s crawl space. (Be aware that some brands may require a layer of drywall covering as well.)
#3 – Complete Crawl Space Insulation
Finally, you’ll need to insulate the rim joists using rigid insulation and caulking it into place to prevent air leaks.
Once that is done, cap the foundation’s interior walls with a 6 ml layer of plastic in addition to galvanized flashing.
This prevents further moisture while serving as a termite barrier to keep your home pest-free as well.
When it comes down to it, over 98% of all homes with basements will experience some type of water damage but you can follow these steps in order to keep your basement dry.
Following these steps above is the best way to ensure proper installation of your crawl space waterproofing barrier.
Don’t hesitate to reach out to a waterproofing professional for more information about home water damage and mold removal.